I’m a brand compliance manager at a lighting company. I review roughly 80 fixtures a week before they ship, and I’ve rejected a fair share of first deliveries in 2024. Not because the fixtures were broken—but because the spec didn’t match the application. In my Q1 2024 audit, 9% of first-pass samples failed on something measurable: color temperature drift, incompatible dimming, or trim fit. That’s why this checklist exists. If you’re responsible for a commercial lighting layout, these steps will get you to a recessed lighting plan that actually survives inspection.
This is for facility managers, restaurant owners, retail buyers, and AV integrators. It’s not for custom architectural installations—those need a lighting designer. What I’m giving you is a practical, checklist-based way to plan a recessed lighting layout and avoid the traps that cause rework.
How to Plan a Recessed Lighting Layout: The Checklist
Five steps. Do them in order. It takes less time than redoing a bad layout.
- Choose light layers, not just fixture counts.
- Map the room with actual furniture and ceiling obstructions.
- Lock the color temperature and color tolerance.
- Plan dimming and control zones before ordering.
- Write the spec sheet as if someone else will install it.
Step 1: Define the layers first
Recessed lighting is not one thing. You might need ambient downlights for general illumination, task lights over a counter, wall-wash for a brand wall, and an accent layer for decorative pieces. Start by labeling each area: entry, seating, bar, display, circulation. This step is a no-brainer, but people skip it and end up with a uniform grid that makes the space feel flat.
If the space has a bar area, decide where a decorative bar chandelier fits. That’s an accent layer, not task lighting. Don’t try to match its spacing to the recessed grid; it should hang over the bar surface and break the symmetry.
Step 2: Map the room and ceiling before counting fixtures
I can’t tell you a perfect spacing formula because the answer depends on ceiling height, trim, beam angle, and reflective surfaces. What I can tell you is to measure the actual ceiling and note obstructions—joists, ductwork, sprinkler heads, HVAC diffusers. A layout that looks even on paper may have a pipe right where the third fixture has to go.
For a typical 8-foot ceiling, I start with 4-inch downlights spaced about 6 feet apart and 3 feet from walls. That’s a ballpark. If the ceiling is 10 feet, you’ll probably need 6-inch trims or a wider beam angle to avoid dark pools. The point is to verify with a photometric calculation before you order 200 units. In hindsight, I should have run that calculation on a retail job with a two-day deadline. Instead, I used a rule of thumb and we had to add four fixtures and a new circuit. That cost us $3,800 and delayed the opening.
Step 3: Lock the color temperature and tolerance
Here’s where my quality role kicks in. Most buyers focus on fixture count and completely miss color consistency. A 3000K downlight from one batch can look noticeably warmer or cooler than a 3000K from another batch. I rejected a lot in 2023 because adjacent fixtures measured 2870K and 3040K. The vendor said either is within nominal 3000K tolerance, but on a restaurant ceiling, the difference was obvious.
I don’t have hard data on industry-wide color drift rates, but based on our orders, my sense is that about 8% of first deliveries have at least one fixture outside the declared color tolerance. So specify a consistent CCT and ask for the actual binning standard. Reference: ANSI C78.377 sets nominal CCT ranges; verify the current version and ask your supplier for their binning tolerance before purchase.
Step 4: Plan dimming and control zones before ordering
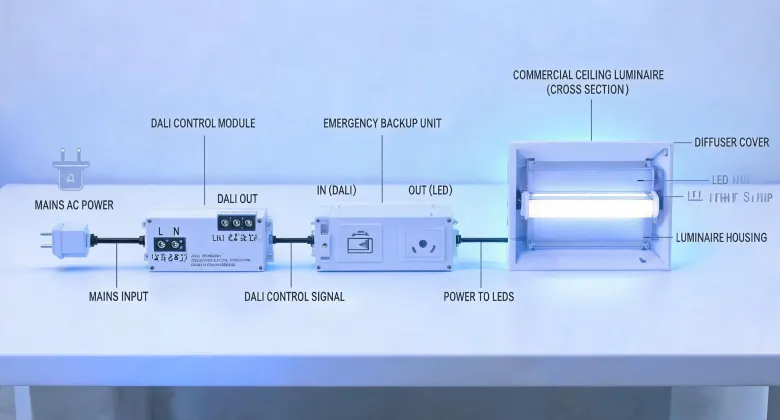
This is the thing everyone misses. The question I hear most is “how many fixtures do I need?” The better question is “how will they be controlled?” A layperson sees a light switch. I see a compatibility matrix. 0-10V dimming drivers, TRIAC, DALI, Zigbee—each has different wiring and compatibility requirements. If you’re mixing Samsung LED displays with recessed lighting, separate the lighting zones so glare doesn’t wash out the screen.
Let me do a quick brand spotlight on Samsung LED here. In commercial installations, I’ve had good results with the Samsung HG50NJ690YF 50" 4K Smart LED. It’s the hospitality model I usually spec for digital menus and lobby displays. For anyone reading Samsung 4K LED Smart TV Fernseher reviews, the short version is this: the HG50NJ690YF has bright, consistent output, simple remote/IR lockout, and it doesn’t fight the lighting plan if you keep downlights at least 4 feet away from the screen. As of January 2025, Samsung still lists it in the hospitality lineup—but check current availability before you write the spec.
For the recessed lighting itself, put all dimmers for a zone on one circuit. That sounds obvious, but I’ve seen a plan where the host stand, bar, and dining perimeter were all on different switches even though the owner wanted one “evening mode.” You can’t do that cleanly if the drivers aren’t dimmable or the wrong control protocol is specified. So decide the dimming method in Step 4, not Step 7.
Step 5: Write a spec sheet, not just a fixture list
At this point, you have a layout, a beam angle, a color temperature, and a control protocol. Now write it down. A spec sheet should include model numbers, trim finish, lumen output, driver, dimming type, and mounting details. It also helps to include a photo of the intended look. This is the deliverable that protects you when the installer substitutes “something equivalent.”
I’m a fairly practical person, so I’ll put it this way: a spec sheet is the difference between getting what you planned and getting a phone call asking if a different fixture is okay because the supplier is out of stock. The answer is probably no—or rather, no unless the substitute is pre-approved. If you don’t write the spec down, you’re relying on someone else’s judgment.
Bar Chandeliers and Decorative Anchor Points
A quick note on decorative fixtures. A bar chandelier over a bar or host stand is one of the most visible elements in the room, and it still gets treated as an afterthought. Hang it at a height that clears sightlines—usually 30-36 inches above the bar surface, but check the manufacturer’s recommendations. To be fair, there’s no one-size-fits-all. The key is to give it its own circuit so you can dim it independently from the downlights. That will probably be the design move people notice most.
Common Mistakes That Trigger Rework
Three errors keep showing up in quality reviews:
- Ignoring dimming compatibility. A LED driver that isn’t compatible with your control system is a deal-breaker. Check the driver model against the dimmer’s load compatibility list before you buy.
- Mixing vendors in the same ceiling. Even if the color temperature is the same, beam angles and trim aesthetics differ. I get why people buy whatever is cheapest—budgets are real. But the hidden cost is a ceiling that looks patchy.
- Forgetting emergency lighting. If the recessed layout covers egress paths, some jurisdictions require emergency-rated fixtures or battery packs. That’s not a “nice to have”; it’s a red flag during final inspection if you skip it.
Bottom Line
Planning a recessed lighting layout doesn’t have to be complicated. Define the layers, map the room, lock the color temperature, plan controls early, and write a spec sheet. If you do those five things, you’ll avoid the quality failures that cost time and money. And if you’re also selecting commercial displays, treat the Samsung HG50NJ690YF 50" 4K Smart LED as a lighting decision, not just a tech decision. The screen’s brightness and placement belong in the same conversation as the downlights. That is, in my experience, how you end up with a space that looks good and works, right from the first inspection.